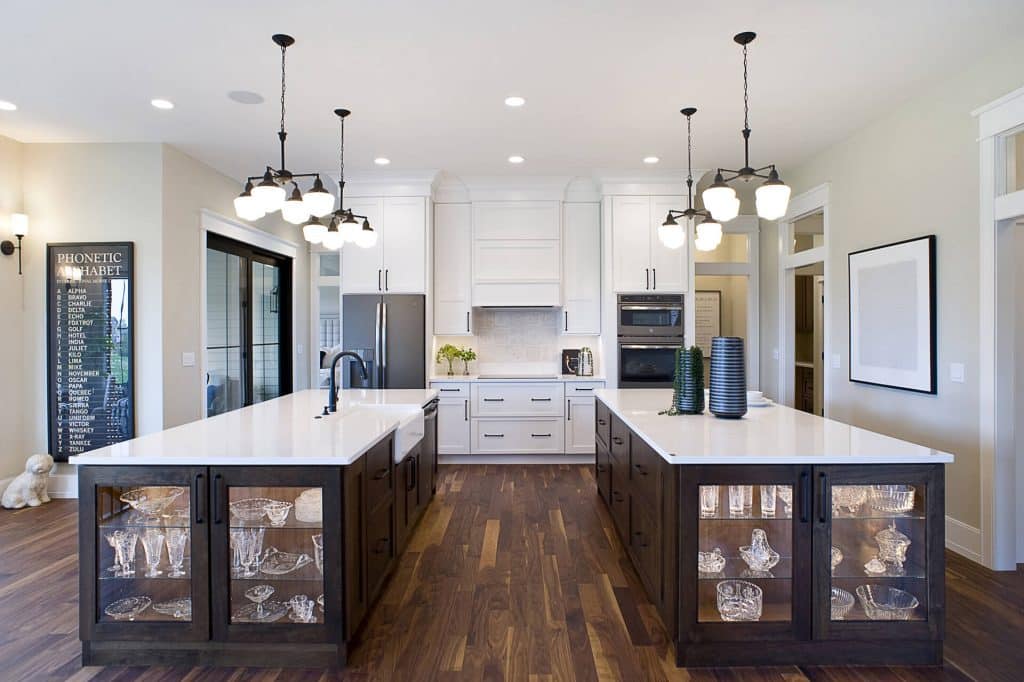
Is it possible to get a fresh, designer feel without the mess of a full gut job? We believe it is, and American Home helps homeowners achieve a big change with small, smart moves. How Can I Update My Kitchen Cabinets Without Replacing Them?
Updating cabinet finishes and hardware often takes less time and money than a full remodel. When cabinet boxes are sound, a surface-focused plan delivers a fast, cleaner, and more budget-friendly result that also cuts renovation waste.
In this guide we set clear expectations: you can transform layout visuals by painting, refinishing, swapping doors or drawer fronts, adding trim and better lighting. We outline what fits a weekend DIY versus a multi-week professional project.
Whether you want a simple refresh or a high-end makeover, we’ll walk through practical ways to create that brand-new look while keeping the existing structure intact. Trust our expertise to help you choose the right path for your kitchen and lifestyle.
Key Takeaways
- Surface changes give big impact: paint, refinish, and hardware swaps.
- Faster and cleaner than a full teardown when boxes are solid.
- Weekend projects vs. multi-week upgrades—plan by budget and time.
- Trim, lighting, and door swaps create a designer new look.
- American Home offers guidance for both DIY and pro-level makeovers.
Why Updating Existing Kitchen Cabinets Beats Full Replacement Right Now
Keeping your current cabinetry often delivers the biggest impact for the least disruption. We guide homeowners to invest where it shows: visible finishes, doors, and hardware.

Save money, time, and mess while preserving layout
Holding on to existing cabinets preserves the room layout and avoids a cascade of extra work.
That means fewer countertop cuts, no plumbing reroutes, and less chance of new flooring or backsplash repairs.
Reduce waste and choose smarter design spending
Reusing solid cabinet boxes keeps usable materials out of landfills and makes the project cleaner.
Redirecting demolition costs to doors, lighting, and hardware often yields a bigger visual upgrade for the same budget.
When replacement still makes sense
- Severe structural or water damage that harms cabinet frames.
- Major layout changes that require new box locations.
- When a full remodel is the only way to reach a desired floor plan.
We offer multiple ways to refresh cabinets so homeowners get durable, beautiful results without unnecessary demolition.
Start Here: Are Your Cabinets Good Candidates for a Makeover?
Begin this project with a clear, practical assessment of cabinet condition and daily use needs. A quick check saves time and money by steering you toward the right scope of work.

Signs the boxes are worth saving
Look for sturdy boxes, square openings, and doors that hang properly. If shelves hold weight and there’s no persistent moisture or swelling, the boxes are usually sound.
Red flags that demand repair or replacement
- Water damage under sinks, delaminating panels, or face frames pulling away.
- Sagging shelves, warped doors, or cracked structural members.
- Persistent damp spots or mold that suggest plumbing or ventilation fixes first.
Material matters: wood, laminate, MDF
Solid wood accepts paint, stain, glaze, or a clear refresh with ease. Laminate and MDF often accept new doors or drawer fronts when the structure is sound, but laminate needs a bonding primer and careful prep.
Bottom line: If storage layout works and boxes are solid, a focused finish project delivers the best return. We help DIYers decide when to proceed and when to call a pro for repairs so the final look lasts.
Define the New Look You Want Before You Touch a Paintbrush
Start by pinning down the overall aesthetic so every choice feels purposeful. That clarity keeps decisions simple and ensures the final result looks intentional, not accidental.
Pick a style direction:
- Modern: Clean door lines, minimal trim, and bold contrast for a sleek feel.
- Transitional: Balanced details that blend classic warmth with contemporary simplicity.
- Classic: Timeless profiles, softer hardware, and layered finishes for an enduring look.
Choose a color approach: Light tones brighten a small space. High-contrast pairings create a dramatic new look. Timeless neutrals keep the room current for years.

Plan visual interest: Treat uppers, lowers, and the island as separate zones. Two-tone cabinets—lighter uppers, darker lowers—add depth and bring balance to the space.
Test paint samples in morning and evening light. Define success in measurable terms: brighter surfaces, cleaner lines, consistent finishes, and a clear focal point that ties the kitchen design together.
Prep Work That Makes Cabinet Updates Look Professional
A carefully planned prep routine is the secret that makes a small refresh read like a high-end remodel.
Prep is the invisible step that determines whether a cabinet refresh looks premium or fails early. Thorough cleaning and degreasing remove oils near pulls and stove areas so primer and paint bond properly.
Scuff sanding should be controlled: enough abrasion to promote adhesion, not so much that profiles lose definition. Patch dents, fill old holes, and smooth seams for a refined finish.
Protect surfaces and plan the workflow
Mask countertops, floors, and openings to control dust and overspray in the room. Major painting jobs need extra masking to keep adjacent spaces clean.
- Remove doors and drawers, label each piece, and set up a staging area to keep the kitchen usable.
- Use spot repairs with stain or glaze so touch-ups blend into the existing finish.
- Follow a two-stage approach: prep first, then the final coat for a smooth, long-lasting look.
We help diy homeowners approach this project with confidence so the final coat performs well and the room looks intentionally finished.
Update With Paint for a Dramatic Kitchen Cabinet Makeover
A fresh coat of paint is the fastest way to shift the room’s mood and make a major visual change.
When paint is the right path: choose this route if you want a big color shift, the boxes are sound, and you accept a surface-focused makeover. Proper prep and product choice determine how long the finish lasts.
Choosing primer and cabinet paint for durability
Match primer to the substrate: bonding primers for laminate or glossy finishes, oil-based primers for stained wood. We recommend cabinet-grade systems that cure harder than trim paint.
Brush and roller vs. sprayer
Brush and roller offer control and less masking. A fine-nap roller plus a quality angled brush reduces texture.
Spraying creates a factory-smooth finish but needs thorough masking and ventilation. Choose based on budget, skill, and the room’s layout.
Two-coat strategy and dry time planning
Apply a thin first coat, sand lightly, then a second coat for even coverage. Allow recommended dry times between coats; full cure may take days, so plan for limited use of the space.
- Prevent DIY tells: keep thin coats, avoid lap marks, and maintain consistent sheen across doors and drawers.
- Two-tone option: lighter uppers and darker lowers brighten a small room and add modern contrast.
- Final tip: good prep plus the right primer equals a durable, high-end result that fits most DIY budgets and schedules.
Refresh the Existing Finish Without Painting the Cabinets
For homeowners who cherish authentic wood, a careful finish revival offers big visual returns with less work. This no-paint approach restores depth and warmth while respecting the original material.
Touch-up repairs for worn spots and scratches:
- Clean and degrease the area to remove oils and residue.
- Lightly scuff sand worn edges and scratches to promote adhesion.
- Blend a color-matched stain or glaze into the surrounding grain for a seamless look.
- Apply a clear topcoat to protect repaired spots and bring uniform sheen.
Clear coat and glaze options: Spot-repair works for isolated wear. If sheen varies across faces, a thin, room-wide clear coat creates consistent protection and finish. Expect slight variation due to grain and light, so test in a small area first.
We recommend gentle cleaners after the new coat cures and avoiding harsh degreasers. These simple ways extend the life of the wood finish and keep the kitchen looking rich and authentic.
Distress, Whitewash, or Add Character to Flat Cabinet Doors
Adding subtle patina gives plain door faces a curated, intentional character. We recommend finishes that read as design choices, not wear and tear. These techniques suit classic, cottage, farmhouse, and eclectic homes where texture adds warmth and interest.
Distressing techniques that look intentional
Layer a light base tone, then apply a slightly darker topcoat. Lightly sand high-touch edges and corners only. This controlled approach keeps the finish purposeful and prevents an overly worn effect.
Whitewashing wood cabinets to keep grain visible
Mix diluted white paint and brush on a thin coat. Let it sit briefly, then wipe back with a rag to reveal grain. Seal with a clear topcoat for protection on higher-use doors and drawer fronts.
- Where to apply: A focal run, island, or a section of cabinet doors adds interest without overwhelming the room.
- Coordination: Match color and sheen so the character finish harmonizes with surrounding finishes and the overall palette.
- Durability: Always finish with a protective coat to keep the look lasting through daily use.
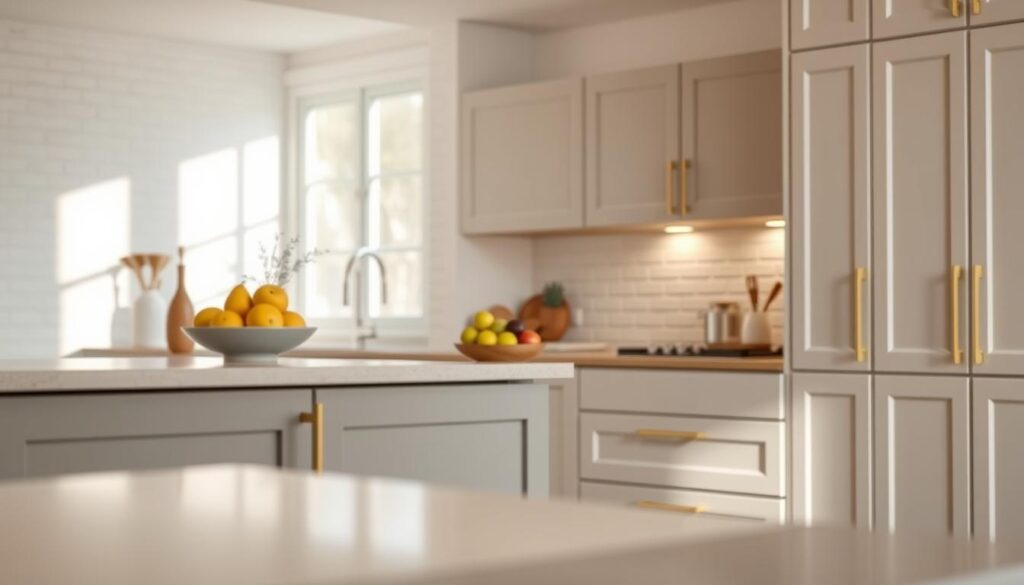
Swap Cabinet Hardware for Instant Style and a New Feel
New hardware refreshes both the look and the tactile feel of every cupboard and drawer. Replacing pulls and knobs is one of the fastest ways to shift kitchen style while leaving boxes and door faces intact.
Choose pulls and knobs that match doors and drawers
Select scale and profile to match door rail widths and drawer heights. Slim, long pulls suit modern flat doors; round knobs complement raised-panel doors.
Measure hole spacing to avoid patch work
Use a simple tape and record center-to-center spacing on every drawer and door. Matching spacing lets you swap hardware without filling holes and refinishing surfaces.
Soft-close upgrades for a premium feel
Adding soft-close hinges and drawer slides dramatically improves perceived quality. These small mechanical swaps make cabinets feel custom, reduce slamming, and are a friendly diy upgrade.
- High ROI: daily use and visible impact.
- Finish coordination: pick warm or cool metals to match faucets and lighting.
- Measure first: avoid extra patching and finish work.
Add Trim, Moulding, and Light Rail Details for a Custom Look
A few well-chosen moulding details turn factory-flat doors into a crafted, built-in look. This approach adds visual interest and depth with simple carpentry rather than a full replacement.
Quick moulding ideas that upgrade plain cabinet door fronts
Apply thin applied rails or shaker insets to flat faces to create shadow lines and proportion. Plan spacing so each door reads consistent across runs.
Crown and under-cabinet trim to elevate upper cabinets
Crown moulding visually extends upper cabinets and makes ceilings feel higher in a small kitchen. Light rail trim below uppers hides fixtures and creates a clean transition to counters.
- Match trim profile to home style so the result feels authentic.
- Ensure trim does not impede door swing or pull clearance for daily storage access.
- Use modest tools: a miter saw, adhesive, and finish nails for a tailored finish.
Replace Cabinet Doors and Drawer Fronts to Transform the Kitchen Without Replacing Cabinets
Replacing visible faces gives a fresh personality to the room while keeping the box work in place. Redooring swaps cabinet doors and drawer fronts while the boxes remain. The result is a dramatic visual change with minimal disruption to layout and plumbing.
We break the process into clear choices so homeowners pick the right scope.
Redooring basics: what changes and what stays the same
Only doors and drawer fronts are replaced. Shelves, frames, and layout stay intact. That keeps costs lower and the project shorter.
Updating door style for a modern look
Switching to cleaner profiles like shaker doors refreshes style instantly. New door proportions, rails, and hardware modernize the space even with the same countertops and flooring.
Matching wood species and finish so new doors blend
Wood grain, species, and sheen matter. We recommend replacing whole runs or sections rather than a single door to avoid mismatched appearance.
Hybrid approach: paint boxes while installing new doors and drawer fronts
Pairing painted cabinet boxes with factory-finished doors gives a crisp, consistent finish. This hybrid strategy widens color options and hides aged box surfaces.
When refacing makes sense for a bigger style change
Refacing covers exposed surfaces and is best when you need uniform wood species or a full style reset. It costs more than redooring but delivers a cohesive new look.
- Redooring defined: dramatic change, same boxes.
- Style upgrade: door profile shifts are high-impact.
- Matching tip: replace by section for best visual fit.
- Hybrid: paint boxes + new doors for consistent finish.
- Refacing: choose for bigger wood or surface changes.
Improve Lighting and Openness for a Brighter, Bigger-Feeling Kitchen
Brightening layered lighting and selective shelving swaps lift both function and style in the heart of the home. We balance beauty and function so the room supports real daily routines while looking fresh.
Under-cabinet lighting for function and ambiance
Under-cabinet light is a true multiplier: it brightens work surfaces and makes the entire kitchen feel more inviting.
Choose LED bars for even task light or puck lights for focused spots. Place fixtures near the front edge so illumination hits the countertop without casting shadows.
- Tip: dimmable drivers add evening ambiance and control glare.
- Placement: aim for continuous runs or evenly spaced fixtures for uniform coverage.
- Effect: layered light makes a small space read larger and cleaner.
Open shelving swaps: where removing upper cabinets works best
Replacing select upper cabinets with open shelving modernizes the silhouette and reduces visual weight.
Use open shelving near coffee zones, display areas, or low-traffic sections so storage stays practical. Keep frequently used items in closed storage to preserve function.
Styling matters: intentional groupings, consistent dishware, and a limited palette keep open shelving tidy and useful.
Budget, Timeline, and Common Worries That Can Derail DIY Projects
We begin with one clear rule: a realistic plan for budget, sequencing, and cure time prevents small jobs from becoming long remodels. That clarity cuts surprises and helps you spend where it matters most.
Avoid a cheap look: keep finishes consistent, pick the right sheen, and limit contrast to planned zones. Small mismatches read as low quality; consistent color and hardware choices lift the whole style.
What lasts in a hardworking kitchen
Painted doors hold up well with proper prep and a durable topcoat. Factory-finished or wrapped fronts resist chips longer and often outlast painted surfaces in busy rooms.
Practical budget and time expectations
- Hardware-only refresh: low budget, short time.
- Painting or finish touch-ups: moderate budget, weekend to a week depending on cure time.
- Door replacements or refacing: higher budget, multi-week project.
Rental-friendly, reversible updates
Choose swaps that give kitchen spaces new life but stay reversible: new pulls, stick-on lighting, and temporary backsplash panels. These low-commitment ways reduce risk for renters.
Risk checklist: test adhesion, plan cure time, stage work to keep the room usable, and pick products suited to the substrate. We help you align budget, material choice, and design intent so results both look and last great.
Get Expert Help in Greater Lansing: American Home Kitchen & Bath Design
Local, experienced guidance helps translate inspiration into a practical plan for a beautiful new look. We built American Home to pair with American Flooring so homeowners enjoy true one-stop shopping for a cohesive remodel.
One-stop shopping for a cohesive remodel
We align cabinet, countertop, and flooring choices so finishes and colors coordinate across the whole space. That reduces costly mismatches and keeps your budget focused on high-impact items.
Expert design staff with 60+ years combined experience
Our team listens to how you use the room, then recommends door styles, finishes, hardware, and lighting that suit both function and style. Professional support reduces risk and delivers a cleaner, higher-quality result—especially for door replacements, finish matching, or hybrid paint plus new fronts.
Contact American Home
- Call: (517) 349-4690
- Email: info@americanhomekbdesign.com
We invite Greater Lansing homeowners who want a confident, polished outcome to partner with us. Let our design team help you plan a successful project and achieve a lasting new look.
Conclusion
Smart choices about finishes and fittings let a well-built box read like a custom install. We summarize the most effective ways to refresh your kitchen: paint for a dramatic shift, refreshed finishes for authentic wood, new doors or drawer fronts for major style change, and upgraded hardware and lighting to refine how the whole space feels.
Begin with a quick check of cabinet condition, pick a clear style and color plan, and commit to proper prep and quality materials for results that last. Consistency matters: matched doors, finishes, and hardware create a cleaner, higher-end look than piecemeal changes.
If you’d like expert guidance to align budget, design, and lasting performance, we’re ready to help you plan a confident, beautiful outcome for your kitchen cabinets.